Showing posts with label Youtube. Show all posts

Monday, 13 May 2013

How to install Android 4.1 Jelly Bean on a Galaxy Y

Hey Guyz... Would you like to install Android 4.1 Jelly Bean on a Galaxy Y?
If you need.. its very easy to install Android 4.1 Jelly Bean on a Galaxy Y.
Follow the simple steps.
Requirements:
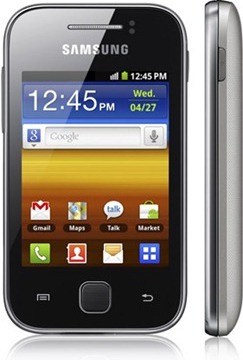
1. Samsung  Galaxy GT-S5360 Smart Phone
2. Your Phone should have around 80% battery remaining


How to install Android 4.1 Jelly Bean on a Galaxy Y

1. Download Clockwork Mode and Copy to SD Card

2. Download JellyblastV3 ROM and Copy to SD Card

3. Turn off your Mobile

4. Turn it again in the recovery mode by holding Volume UP key + Home + Power Button at the same time

5. Select Apply update from SD Card
    (Use Volume key for moving and press home key)

6. Choose CWM
    (if you need take back up)

7. Then choose Wipe Data  / Reset   and Select Yes __delete All u

8. Then choose Wipe Cache Partition and Select Yes Wipe Cache

9. Then choose Advance - Wipe Galvik Cache and Select

10. Now you are going to install  Android 4.1 Jelly Bean on a Galaxy Y
    Choose install zip from sd
    Select JELLYBLASTV3 ROM  and Selecet Yes_ install JELLYB
    (it would take some more time)

11. If its done , go back clockwork recovery menu and select Reboot System Now
      (first time start up will take around 5 minutes)

Thats it........ you are done.. now you can enjoy with your new  Android 4.1 Jelly Bean.

Subscribe my Youtube Channel and findout more videos..
Clockwork Mode


JellyblastV3 ROM
                        

Watch Youtube Tutorial
Coming Soon on Youtube Channel

Thursday, 11 April 2013

Solution of Airtel/Idea 3G VPN 500 Internal Server Error April 2013 [SOLVED] Torrent / IDM Supported

Most of the VPN users are getting this 500 Internal Sever Error on April.

I have the solution for this.........

Subscribe Youtube Channel :  http://www.youtube.com/shafeersha


Download the updated VPN and paste it in your Config File..

OR
Download Special Software


Incoming Search:

Airtel / Idea 3G hack 2013 all over India
Hexvpn updated Version
Airtel 3G Config File updated April 2013
VPN Solution for 500 internal server error
Idea 3G Hack 2013
Free Internet Access
Airtel 3G VPN Trick 19 April 2013 Torrent Supported
IDM Supported / Torrent Supported
IDM Configuration for Vpn Trick unlimited download
Torrent Configuration for vpn trick unlimited download 

Monday, 18 February 2013

Page Number Navigation for Bogger

How to Add Page Number Navigation for  Blogger

This  Awesome widget for blogger. This one will replace your older link, newer link and home link with stylish number navigation. So that you can easily find your page by selecting page number navigation.
This tutorial will show you how to add page number navigation in your blogger.

1. Go to Blogger - Template - Edit HTML   and Mark 

    Find below code  

  <b:includable id='mobile-index-post' var='post'>


2. Copy below code and paste it before <b:includable id='mobile-index-post' var='post'>


<b:includable id='page-navi'>
<div class='pagenavi'>
<script type='text/javascript'>
var pageNaviConf = {
perPage: 6,numPages: 3,firstText: &quot;First&quot;,
lastText: &quot;Last&quot;,
nextText: &quot;Next&quot;,
prevText: &quot;Prev&quot;
}
</script>
<script src='http://yourjavascript.com/815315225/www.mybloggerblog.com.js' type='text/javascript'/>
<div class='clear'/>
</div>
</b:includable>


3. Find below code 

  <b:include name='nextprev'/>

4. Replace above code with following Code


<b:if cond='data:blog.pageType == &quot;index&quot;'>
<b:include name='page-navi'/>
<b:else/>
<b:if cond='data:blog.pageType == &quot;archive&quot;'>
<b:include name='page-navi'/>
</b:if>
<b:else/>
<b:if cond='data:blog.pageType == &quot;item&quot;'>
<b:include name='nextprev'/>
</b:if>
</b:if>

5. Add CSS code. Find this code ]]></b:skin>
    copy below code and paste before ]]></b:skin>


#blog-pager, .pagenavi {
     clear: both;
     text-align: center;
     margin: 30px auto 10px;
}
.pagenavi span, .pagenavi a {
    background: #f7f7f7;
    background: -webkit-linear-gradient(top, #f7f7f7 0%,#f5f5f5 52%,#ebebeb 100%);
    background: -moz-linear-gradient(top, #f7f7f7 0%,#f5f5f5 52%,#ebebeb 100%);
    background: -o-linear-gradient(top, #f7f7f7 0%,#f5f5f5 52%,#ebebeb 100%);
    background: -ms-linear-gradient(top, #f7f7f7 0%,#f5f5f5 52%,#ebebeb 100%);
    background: linear-gradient(top, #f7f7f7 0%,#f5f5f5 52%,#ebebeb 100%);
    padding: 5px 10px;
    text-decoration: none;
    color: #7e7e7e;
    border: 1px solid #c6c6c6;
    -webkit-box-shadow: inset 0 4px 3px rgba(255,255,255,0.6), 0 1px 3px rgba(0,0,0,.2);
    -moz-box-shadow: inset 0 4px 3px rgba(255,255,255,0.6), 0 1px 3px rgba(0,0,0,.2);
    box-shadow: inset 0 4px 3px rgba(255,255,255,0.6), 0 1px 3px rgba(0,0,0,.2);
    font-weight: bold;
    border-radius:3px;
}
.pagenavi span:hover,.pagenavi a:hover, .pagenavi a.current {
    background: #9ad6fb;
    background: -webkit-linear-gradient(top, #9ad6fb 0%,#77c4fc 100%);
    background: -moz-linear-gradient(top, #9ad6fb 0%,#77c4fc 100%);
    background: -o-linear-gradient(top, #9ad6fb 0%,#77c4fc 100%);
    background: -ms-linear-gradient(top, #9ad6fb 0%,#77c4fc 100%);
    background: linear-gradient(top, #9ad6fb 0%,#77c4fc 100%);
    border: 1px solid #72ade4;
    color: #4879a6;
    -webkit-box-shadow: inset 0 1px 4px rgba(255,255,255,0.75), 0 1px 3px rgba(79,126,167,.5);
    -moz-box-shadow: inset 0 1px 4px rgba(255,255,255,0.75), 0 1px 3px rgba(79,126,167,.5);
    box-shadow: inset 0 1px 4px rgba(255,255,255,0.75), 0 1px 3px rgba(79,126,167,.5);
    -webkit-transition: all 0.25s ease 0s;
    -moz-transition: all 0.25s ease 0s;
    -o-transition: all 0.25s ease 0s;
    transition: all 0.25s ease 0s;
}
.pagenavi { border:none; } More Details: www.shafeelive.blogspot.com


6. You are done. Save your Template and check your blogger. Enjoy with your New Awesome  Page Number Navigation.


Watch Youtube Video Tutorial

Wednesday, 6 February 2013

Hack Nokia S60v3 or S60v5 Mobile Phones


Are you getting certificate error while you are trying to install applications?

Would you like to install unsigned software/ applications on your Nokia Mobile?
Then you need to hack your phone

You can easily hack your Nokia S60v3, S60v5 Mobile Phones.


Follow Simple Steps:

Download all files given below

1.  X-Plore               - Download
2.  Mobile Security   -  Download
3.  RomPatcherPlus_3.1_LiteVersion   -  Download
4.  Installerserver.zip     -  Download
5.  tmquarantine.zip       -   Download

Install  X-Plore, Mobile Security and RomPatcher.

Open the X-Plore  take  tmquarantine.zip  then extract to C:


Open Mobile Security take Options Select Quarantine List take Options -Mark All - Press Options Select Restore, ignore the warning Press YES and close it.


Open Rompatcher take options Select All Patches -Apply and close it.


Open X-Plore Select  9.3, 94.zip extract to C:\ sys\bin and close it.

You are almost done. Now your nokia S60 V3 or V5 might be hacked.
Just try to install unsigned software / applications, if you could successfully installed that means your phone is  hacked.

Now you can remove / uninstall  Mobile Security....

Enjoy...................

Watch Youtube Tutorial

Hack Nokia 5800, 5530, 5228, 5230, 5233, 5235, 5250, 5800, C5-03, C5-04, C5-05, C5-06, C6-00, N97, N97 mini, X6-00

Saturday, 5 January 2013

Save web content to Google Drive.

Save to Google Drive Chrome extension helps that you can save web content to your Google Drive. Click here to Add Save to  Google Drive


Watch Online Video

Thursday, 3 January 2013

Create Contact Form for Blog / Website by using Google Drive

Contact form for Blogger/ Website. Would you like to create Contact form for your Blogger?
Here is the easy way to make contact form by using Google Doc. You can publish it on your Blogger.
You need to follow some simple steps.


Step 1:- Create Contact Form

Go to Google Doc  - Click Create -  Form

Type your form Name  (eg: Contact Me)

Type the Question Title (eg: Name/ Comments)
Question type : Select Text/ Paragraph

*you can make mandatory fields by selecting the click box


You can Add Items of Question Title like Email, Comments, Mobile No etc..

After make all the questions, you can Save your Contact Form....


Step 2:-  Copy HTML Code

Take More actions - Embed which is in top right side of  Google Doc


Step 3:- Create Contact Page for your Blogger/ Website

Go to Blogger-  Page - New Page- Edit Html and Paste your Embed Code which you copied from Google Doc.


Step 4:- Notify to your Email

When someone fill the Contact form, that will go to your Google Doc Spreadsheet. You have to Turn on your Email Notification.

Go to Google Doc - Click your Contact form which you Created in Google Doc
You will see spreadsheet 
Go to Tools - Notification Rules - Click A user submits a form and Email Straight away and Save it.

You are done. You will notify when someone contact you on your blog...

Watch Online Video Tutorial

Friday, 21 December 2012

Watch Live Channel- PSY Concert "HAPPENING" Live Stream!- Gangnam Style

Thursday, 13 December 2012

Awesome Fixed Position Slide Open Egg Social Sharing Gadget For Blogger

Awesome sharing Gadget for blog/ website. Blog visitors can share your blog to Facebook, Twitter, Google+, Email, LinkedIn, Blogger and more than hundreds of bookmark. This is the great idea for spreading your blog posts.


This tutorial will show you How to insert Slide Open Egg Social Sharing Gadget to Blog/ Website. Here is the easy way to get this Gadget


Step: 1  Blogger Template- Edit HTML  -  then proceed

         Find  </head> in search bar by using cntrl + F

         Copy below code and paste above </head>


<!-- Start Shafee Live Gadget Code From  http://shafeelive.blogspot.in  -->
<script src='http://w.sharethis.com/gallery/shareegg/shareegg.js' type='text/javascript'/><script src='http://w.sharethis.com/button/buttons.js' type='text/javascript'/><script type='text/javascript'>stLight.options({publisher: &quot;9ba5cdf6-dd56-44f0-bc81-56cfef2b80d8&quot;, onhover:false}); </script><link href='http://w.sharethis.com/gallery/shareegg/shareegg.css' media='screen' rel='stylesheet' type='text/css'/><!-- End Shafee Live Gadget Code From http://shafeelive.blogspot.in   -->

Step: 2  Find  </body> in search bar by using cntrl + F     

         Copy below code and paste above </body>


<!-- Start Shafee Live Code From http://shafeelive.blogspot.in -->
<div style='position: fixed; bottom: 2%; left: 2%;'>
<div class='shareEgg' id='shareThisShareEgg'/></div><script type='text/javascript'>stlib.shareEgg.createEgg(&#39;shareThisShareEgg&#39;, [&#39;facebook&#39;,&#39;twitter&#39;,&#39;googleplus&#39;,
&#39;linkedin&#39;,&#39;blogger&#39;,&#39;stumbleupon&#39;,
&#39;sharethis&#39;], {title:&#39; <data:blog.pageTitle/>&#39;,url:&#39;<data:blog.url/>&#39;,theme:&#39;shareegg&#39;});</script><a href=' http://shafeelive.blogspot.in/2012/12/awesome-fixed-position-slide-open-egg.html'>Get This Gadget</a><!-- End Shafee Live Code
From http://shafeelive.blogspot.in  -->

 You are done, SAVE your Template, Enjoy with your Awesome Sharing Gadget

Customization of  the Gadget:

 If you need to place this gadget to top, you can easily change bottom to top
 If you like to align this gadget to right side, you can simply change left to right

Watch Video Tutorial

Monday, 10 December 2012

How to Activate Windows 7 / How to Check Windows 7 is Genuine


This tutorial will show you how to Activate Windows 7 in your computer. 

How to Activate Windows 7/ How to Check Windows 7 is Genuine

1. Check which operating system installed in your computer

2 .Go to Start - Run- Type  "slui"   Enter...

This window will prompt you Windows 7 Operating System is Activated and Genuine

Watch Video Tutorial

Thursday, 6 December 2012

Add Facebook Comment Box to Blogger/ Website

Facebook comment box  can be embedded to any blog or website. Blog visitors can comment with their facebook ID. Here is the simple way to Add Facebook Comment Box to your blog or website...
You need to follow some simple steps.

Facebook Comment Box


How to Add Facebook Comment Box to Blog/ Website

Step:1 Get Facebook  Application ID

Go to Facebook Developers Page


Click on Continue

Enter App Domain and Site url-> Save


Step:2  Facebook Comment box code Add to Template

Note: You have to take Backup your template before doing this..

Blogger->Settings->Comments->Select Embedded

Blogger-> Design -> Edit HTML with Expand Widget

A) Find <html   in search box

     Copy below code and paste after <html

   xmlns:fb='http://www.facebook.com/2008/fbml'                                                                    

B) Find <body>  or
             <body expr:class='&quot;loading&quot; + data:blog.mobileClass'>

     Copy below code and paste after <body>
 
       <div id='fb-root'/> 
     <script> 
      window.fbAsyncInit = function() { 
       FB.init({ 
       appId  : &#39;YOUR_APP_ID&#39;, 
       status : true, // check login status 
        cookie : true, // enable cookies to allow the server to access the   session 
        xfbml  : true  // parse XFBML 
       }); 
       };
      (function() { 
      var e = document.createElement(&#39;script&#39;); 
      e.src = document.location.protocol +   &#39;//connect.facebook.net/en_US/all.js&#39;; 
      e.async = true; 
      document.getElementById(&#39;fb-root&#39;).appendChild(e); 
      }()); 
      </script>             
     
Replace YOUR_APP_ID with your Facebook application ID which you created in facebook application


C) Find </head>
     Copy below code and paste above </head>


<meta expr:content='data:blog.pageTitle' property='og:title'/> 
<meta expr:content='data:blog.url' property='og:url'/> 
<meta content='Shafee Live' property='og:site_name'/> 
<meta content='Blog Image URL' property='og:image'/> 
<meta content='YOUR_APP_ID' property='fb:app_id'/> 
<meta content='http://www.facebook.com/shafeernalil' property='fb:admins'/> 
<meta content='article' property='og:type'/>


     Replace Shafee Live  with your blog Name.
     Replace Blog Image URL with your image logo.
     Replace YOUR_APP_ID  with the your Facebook Application ID
     Replace http://www.facebook.com/shafeelive with your Facebook profile
     link

D) Find <b:includable id='comment-form' var='post'>
     Copy below code and paste after <b:includable id='comment-form' var='post'>

<b:if cond='data:blog.pageType == &quot;item&quot;'>
<div style='padding:0px 0px 0px 0px; margin:0px 0px 0px 0px;'><script      src='http://connect.facebook.net/en_US/all.js#xfbml=1'/>
<div> <fb:comments colorscheme='lightexpr:href='data:post.url' expr:title='data:post.title'    expr:xid='data:post.id' width='520'/></div> <div style='color:#fff; background-color:#3B5998;border:  solid 1px #ddd; font-size:10px; padding:3px; width:510px;'>Facebook Blogger Plugin: Bloggerized by  <b><a alt='blogger templates' href='http://www.shafeelive.blogspot.com/' style='text-decoration:underline;  color:#fff;' target='_blank' title='blogger templates'>Shafee Live</a></b></div></div>
</b:if>             

    If you need to use dark comment box, just replace light with dark
    For comment box size changing, just change the value of width='520'
    For change the comment box footer, Just change tha value of width=510px

E) You are almost done. Save your template and see your blog Facebook Comment Box should be there...Enjoy..............
Watch Video Tutorial

Wednesday, 28 November 2012

How to Check Windows XP / Vista OS Activated and Genuine

Tutorial:


This tutorial will show you how to Check windows XP/ VISTA Activated and Genuine.
1.Make sure Which Operating System installed in your Computer

2.Then Start- Run

3.Type "oobe/msoobe /a" Enter

This window will prompt you Windows XP/ Vista Operating System Activated and Genuine

Watch Online Tutorial

How to find the MAC Address of your Windows Computer

Tutorial:

1. Type CMD option from Windows Start Search Menu and Enter
2. Type this command and Enter:   ipconfig /all
3. Find the word 'Phisycal Address'  
                                                    
                        OR
 If you have the Internet Connection

1. Click on Local Area Connection                       

2. Click Status-Support-Details-Physical Address...

 Note: This method will work with all Windows Versions..

  Watch Youtube Tutorial

Funny Bengali Singing in Arabic